Canning of Beef Broth

Key Takeaways
1. Discover how to safely can beef and beef broth, extending their shelf life while ensuring they remain safe to consume. This method involves processing the contents in air-sealed jars, preserving their quality and taste for longer periods.
2. Canned meat provides a convenient, ready-to-eat option for meals. Whether you’re preparing for emergencies or simply looking for a quick meal solution, having canned meat on hand can be a lifesaver.
3. Canning beef not only preserves the meat but also creates a delicious broth in each jar. This flavorful broth can be used as a base for gravies, soups, stews, and other dishes, adding depth and richness to your recipes.
4. Our step-by-step guide simplifies the process of canning beef, making it accessible to beginners. By following these instructions, you can ensure that your canned meat is both safe and of high quality, ready to be enjoyed whenever you need it.
What is Canning?
It is a method of preservation of food which processes the contents of food and packs them in air-sealed jars. Canning increases the shelf life of a commodity from one year to 5 years depending upon its perishability and nature.
The idea of canning is to make the commodity available and edible for a long time after this procedure.
Canning meats & poultry:
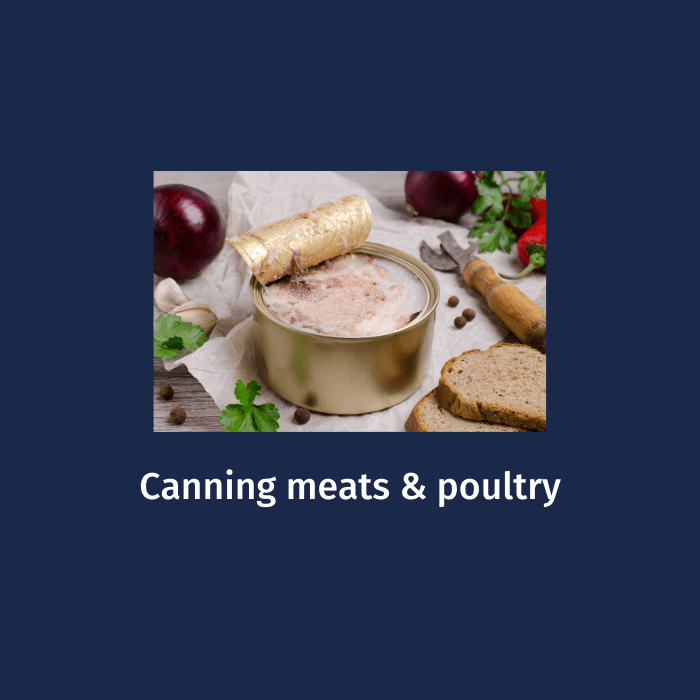
Poultry and meat are acidic food with low pH that provides a favorable environment for Clostridium botulinum growth which is responsible for the deadly foodborne disease.
Pressure canning is a safe and perfect solution for canning poultry and meat.
A great way to be prepared is to have quick and easy ready-to-eat meals present at home. The method of the raw pack is simple and easy to follow.
The meat can be added to stews, casseroles, soups, or consume straight out of the container.
In this article, we will focus on how to can beef and beef broth. So stay with us.
Can you water bath can meat?
The answer to this question is No. A hot water bath does not provide a safe temperature for the storage of food.
Why Can Beef?
When do you think of canning meat what comes to your mind? You might think of using a pressure cooker to can meat concerning safety concerns. It is safe to can beef and tastes delicious.
Why you should learn to can meat?
- Prepardness.
- The convenience of meals.
- Occupy less space in the freezer.
- The taste is amazing.
- Bonus- an amazing broth is created by each jar so make sure to use it as a base for gravy or in a soup.
Supplies:
- Salt (optional)
- Water
- Beef, elk or pork, venison
- Pressure cooker
- Canning jars, rings, and lids
- For easy handling of hot foods for canning, kitchen tongs must be purchased
- Magnetic lid lifter
- Bubble remover
- Funnel
Steps to canning meat:
1. Selection of meat:
- It is a very important step to start the procedure as you can request a butcher for custom cutting if you purchase beef from a local farmer.
- Many of them will cut the beef properly for canning.
- Mostly the pressure cookers can fit 7-quarter jars.
- For beef canning, any cut of beef works best but stew meat is a better option.
- Because of the long processing time, canned meat turns out soft.
- So you can go for a tougher meat cut. The more tender ones are saved for consuming fresh out of the freezer.
- A pressure canner is the only way to can beef.
- Safe and simple method if once you get familiar with the pressure cooker.
- High quality, chilled meat is selected.
- Defrost the meat in the fridge, in the microwave, or in cold running water.
2. Preparing the meat
- Remove extra fat from the meat and cut it into small pieces (1-2 inches).
- If preparing the meat from large pieces of meat, cut the meat simply into 1-2 inches.
- Trim as much fat as possible.
- Soak the meat in brine water containing salt for 1 hour.
- Rinse the meat.
- Large bones are removed.
- Cut the pieces into cubes, chunks, or 1-inch wide strips.
Raw Pack method
- When you want to have easy meals without considering store-bought options, having canned meat jars is a great choice.
- The stored food need to be diversified. It does not mean to have plenty of frozen and packaged meat when the power is out.
- The perfect solution is to have canned meat. It is cooked fully, soft, and full of flavor-packed juicy.
- Right straight from the jar you can eat it or add the meat to stews and casseroles.
Procedure:
- 1 teaspoon per pint or 2 teaspoons of salt per quart added to the jar.
- Leave 1-inch headspace and the rest of the jar is filled with the pieces of the meat.
- The liquid is not added.
- Jar rims are wiped out.
- Lids are adjusted and process the jars in a pressure canner.
Hot Pack:
- Meat is pre-cooked till rare by stewing, browning, or by roasting in a small portion of fat.
- ½ teaspoon of salt per mint or 1 teaspoon salt per quart is added to the jar.
- Loosely pack hot meat by leaving a headspace of 1-inch.
- Boiling broth, water, tomato juice, or meat drippings are filled in the jars.
- The bubbles are removed.
- Jar rims are wiped.
- Lids are adjusted.
- Process the meat in a pressure canner.
For these two methods, pints are processed for 75 minutes and quarts for 90 minutes.
- Weighed gauge pressure uses 10-15 pounds pressure to process jars.
- Dial-gauge pressure canner uses 11- 12 pounds pressure to process jars.
Note:
Disease-causing organisms and spoilage occur on poultry and meats. The four C’s (clean, chill, don’t contaminate and pressure can properly) are evaluative to produce high quality, safe, and high quality canned meat.
3. Packing the jars:
- The jars are examined for cracks, sharp edges, or nicks.
- Screw bands are checked for rust or dents.
- The airtight seal in perfect condition may be obtained by only using jars, bands, or lids.
- Pack the raw meat into sterilized jars.
- The meat is packed tightly by pushing the meat down by using a kitchen tool or a hand.
- A butter knife is used for the removal of air pockets.
- 1 inch is left at the top of each jar.
- The liquid is not added.
- Rim is wiped with a clean, damp cloth for the removal of dirt or debris.
- Lid is placed and tightened by hand.
4. Preparing the pressure canner:
For using a pressure canner the basic instructions are:
- The sealing ring is removed and observed for cracks, dirt, and misshaping. After a couple of years, the ring is replaced. The sealing ring is lubricated. The sealing ring is replaced with the canner lid.
- The jars are examined for sharp edges and cracks.
- The sterilization of jars is done by placing the lid for a couple of minutes.
- Place the canning rack in a canner. The rack is used to avoid breakage.
- The jars are filled with raw pieces of meat. Avoid addition of liquid.
- The air bubbles are removed by a clean, damp cloth.
- The sealing edges are wiped with a damp, clean cloth.
- The jar lids and screw bands are adjusted.
- The jars are placed into the canner.
- The cover is placed on the canner.
5. Processing time:
- The time of processing starts after the canner attained the pressure of 11 pounds.
- The canned should not be left unattended.
- With the increase or decrease of heat, the pressure can be regulated.
6. Cooling down:
- Carefully remove the canner from the heat.
- It will be very hot and heavy.
- The pressure is allowed to a dropdown.
- The cooling speed of the canner must be regulated to avoid jars breakage.
- The air vent drops down as the pressure is reduced.
- The pressure regulator is removed and cool it for 10 minutes more.
7. Opening the canner and storing the jars:
- The cover is removed carefully.
- Use hot pads or tongs to take out the jars from the canner.
- Put the jars on a wooden cutting board or a towel.
- Do not touch the jars till fully cooled.
- A pop sound is heard for each jar as a part of the sealing process.
- After cooling, the jars are cleaned and checked for seal.
- The seal is checked by pressing the middle of the lid.
- The jars must be placed in the fridge.
Preparation of canned Beef broth:
It is very easy to prepare canned Beef broth. Close attention must be paid to the jars while opening.
- The jars are examined for mold.
- The jars are opened with a popping sound. The seal break should be heard.
- The meat is smelled for spoilage.
- The contents are visually observed. The presence of mildew means spoilage.
- Meat is heated thoroughly for eating.
Canning Beef Recipes:
1. Beef Stir Fry with Fresh Veggies:
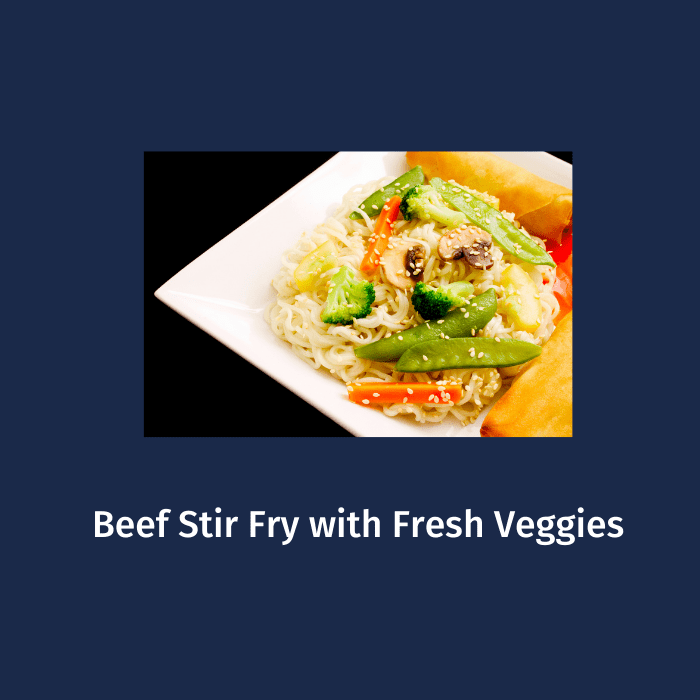
The canned or fresh beef is served with frozen or fresh veggies. It has a cooking time of 20 minutes and served as the main course. It is Chinese cuisine.
Ingredients
- Sesame oil 2 tbsp
- Stir fry vegetables 32 oz
- Canned beef, 1 quart
- Garlic powder 2 tsp
- Ginger 1 tsp
- Soy sauce ½ cup
- Rice vinegar 1/3 cup
- Doonk stevia 1
- Sesame seeds 2 tbsp
Instructions:
- Heat sesame seed on medium heat in a large skillet.
- The vegetables are sautéed until soft.
- Canned beef is added and vegetables are stirred.
- The sauce is poured on the veggies and beef.
- It is simmered for 5-10 minutes or till hot.
- The meal is served with rice.
2. Homemade Chili Meat using a pressure canner:
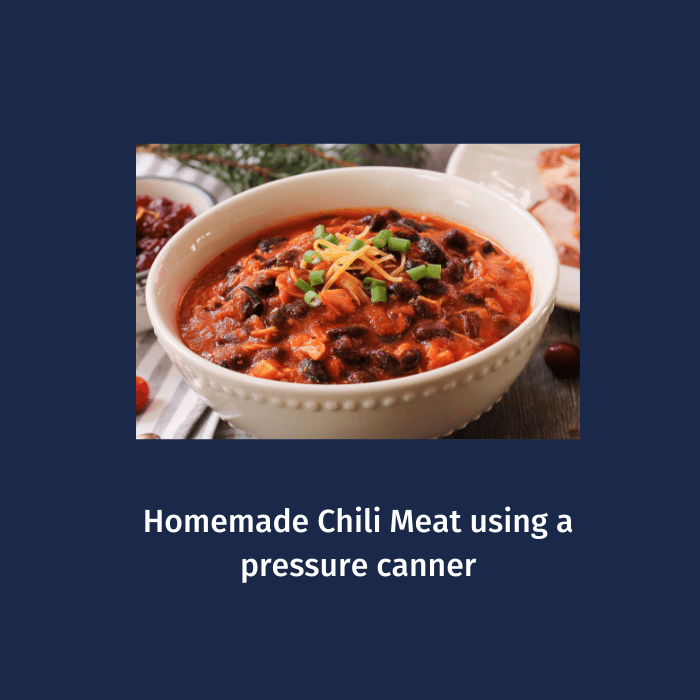
Ingredients
- Dried pinto or kidney beans 3 cups
- Water 5 ½ cups
- Salt 5 tsp
- Ground beef, turkey, chicken 3 lbs.
- Chopped onion 1 ½ cup
- Chopped peppers 1 cup
- Black pepper 1 tsp
- Chilli powder 3-6 tbsp
- Cumin 2 tbsp
- Oregano 2 tsp
- Crushed or whole tomato 2 quartz
- Lemon or lime juice 2 tbsp
Conclusion:
In this article, we have focused on canning the beef broth and how to use it for later use. It is a convenient method to can meat and stores it for later use. It also utilizes less space in the refrigerator. The canned meat is safe to use and tastes delicious.
Frequently Asked Questions
1. Do you have to cook meat before canning?
The browning of cubes is the ultimate goal here. There is no need to cook the whole meat. The beef is canned with the use of a pressure canner for tender soft meat and place the cubes of the meat into glass jars.
2. How long does pressure canned meat last?
The food if preserved correctly is safe and used for many years however, the nutritional value and quality are affected with time. It is recommended to preserve food for one year only.
3. What is the best cut of beef for canning?
The steaks and roasts are the best cuts of beef for canning as these cuts are lean and heavily marbled. The more cooking time is required to tenderize it. The fat outside the steak needs to be removed and wasted away.


